
A practical guide to DIY wedding invitations for future brides and mums who love making almost everything themselves
It’s well known that it’s often the bride who dedicates time and energy to planning and designing her own wedding. And there are brides who love to get their hands dirty and make almost everything themselves, so they can proudly tell their guests “I made this“, or simply to save a little extra money on the budget.
I know this for certain because I am one of them. Wedding stationery is one of the most DIY-friendly areas of a wedding, especially since there are now so many free resources available online, not just for invitations: order of service booklets, seating charts, ring bearer boxes, wedding favours and even tutorials for making your own guest book.
In writing this post, I had exactly this type of bride in mind, and I wanted in particular to focus on making DIY wedding invitations, also to wrap up a topic I had already started on the blog some time ago.
The moment you start thinking about your invitations is also the best time, for most of our clients, to activate a wedding registry with us. At the same time as activating it, you can include the URL of your personal website, provided free of charge by Given2 to all future newlyweds who choose it to receive gifts in a practical and affordable way. on your DIY paper invitations.
Shall we get started? What you are about to read is the most detailed guide you can currently find on the web, covering everything you need to know to make your own invitations. I therefore recommend saving it to your favourites, so you can find it and read it again whenever you like.
Choosing the Paper
First things first, let’s start with the paper. This is a decisive step before you begin making your invitations, as it depends greatly on the style you have chosen for your ceremony and must be selected carefully. I therefore recommend opting for a premium, coloured paper.
The most common colour choices are:
- White: ideal if you want neutral DIY wedding invitations, or if you prefer to personalise them with illustrations.
- Ivory or cream: the ideal colours for those who want to keep things classic and to coordinate with the bride’s dress and decorations. In this case, text in shades of black, navy, green or burgundy works best.
- Light blue (Carrara marble) or lilac (purple): a delicate sky blue is the ideal solution for those who want elegant invitations with a touch of colour.
- Ochre: a colour very similar to orange that will give your DIY wedding invitations a bold character (one of the colours that works particularly well alongside lilac).
- Pearl: a shade leaning towards grey, refined yet modern, particularly suited to evening weddings.
Paper weight
The paper weight indicates the thickness of the paper sheet you will use. For DIY wedding invitations, to achieve the best results, you generally work with weights ranging from 90gsm to 200gsm. A lighter paper risks getting damaged or creased, while a heavier one could be difficult to handle during the making process.
DIY envelope (or holder)
To clarify, the wedding invitation itself is the sheet that contains: the ceremony details, the text “we are delighted to announce our wedding…” and, for those invited to the wedding reception as well, the reception card. This precious sheet will in turn be contained and protected within a card sleeve (the weight of which we have just discussed).
If the invitation is to be posted, everything will then need to be placed inside a nice envelope (ideally coordinated with the graphic design of your invitation), on which you will need to write the address and name of the guest.
So, before getting into the details of how to make DIY wedding invitations, let’s take it step by step and start by making the envelope. To do this, I have selected some easy-to-follow YouTube tutorials, based on the main styles used and recommended by graphic designer Cristina Salvatori on our blog.
Square origami-style envelope (pocket format)
Rectangular origami envelope with pocket for DIY wedding invitations
Busta origami rettangola con tasca per partecipazioni di matrimonio fai da te
Rectangular A4 double-flap envelope with central opening, suitable for a Valentine’s Day style wedding
Large A4 double-flap rectangular envelope variant with central opening
Double-flap invitation with central opening in Shabby Chic style
Foldable rectangular invitation with side opening
If you are not very handy with crafts, I recommend printing this template,
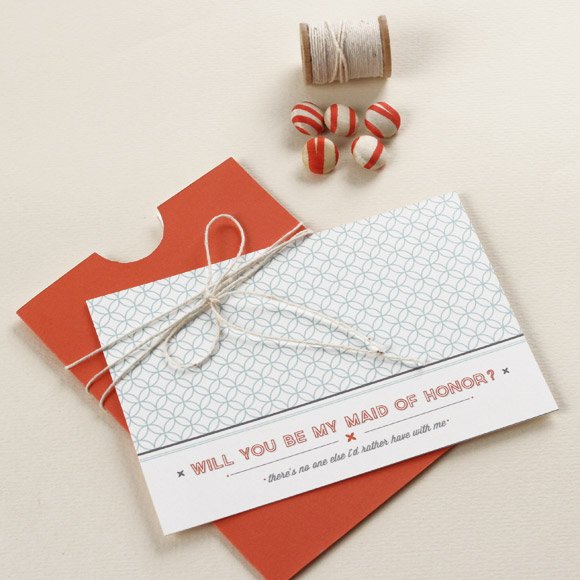
which you can cut out and trace onto the premium paper you have chosen to make the envelope for your DIY wedding invitations, then fold it accordingly. Then glue the flaps following the dotted lines indicated, or print it directly onto an A4 card.
Bear in mind that if you choose the latter option, you risk using a lot of ink and, if you are not very experienced, making mistakes and wasting materials and therefore money, as well as being limited to a single colour. In my opinion the first option is the better one, but further on you will find more tips to consider when it comes to printing, so you can choose the solution best suited to your situation.
What to Write in the Text
For the inner text, you can write it by hand if you have lovely handwriting, or alternatively you can use a word processing programme.
To decorate the sheet containing the text, you can use the collage technique, for example by cutting out elements from floral paper, or use a stencil, or if you know how to use graphic design software, you can embellish them with ready-made illustrations, downloadable for free in two or more formats:
- In .jpg, which you can print, cut out and glue onto the invitation using the collage technique.
- In Illustrator, .tiff or .eps format, for those with the Adobe suite only (you can try it free for one month), to import directly into the file before printing.
Which Fonts to Use
The choice of fonts is also important for the visual success of your DIY wedding invitations. The most commonly used software for writing includes: Adobe Photoshop (or its free but slightly more complex equivalent: GIMP), Publisher, as well as Word (or its free equivalent LibreOffice Writer) and PowerPoint (or its free equivalent LibreOffice Impress).
With the latter two in particular, it is possible not only to create an invitation from scratch for any occasion, but also to use one of the many free templates and layouts for Office programmes made available by Microsoft.
To clarify, a template — a term you will come across frequently throughout this article — is a document containing pre-defined graphic settings that serves as a base for developing a page layout.
Thanks to a template, we can create pages while maintaining a consistent graphic base, varying only the content. To access a wide range of fonts, you can easily search for them online. The resource I recommend, where you can download them for free, is this one. I know, there are a lot of them. Which one to choose? How about these?
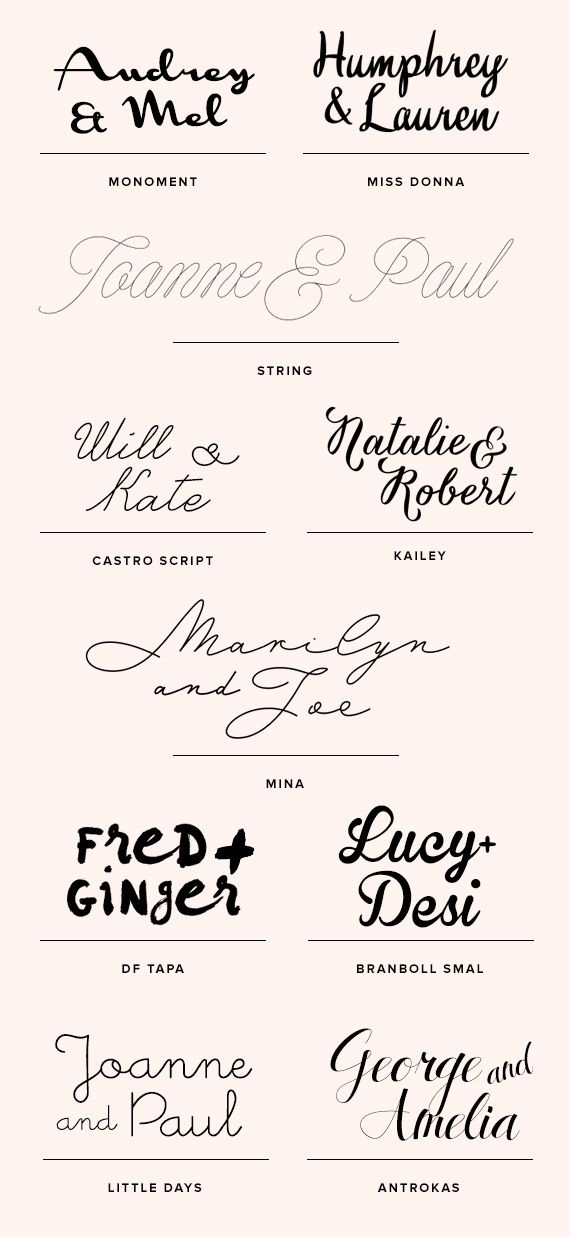
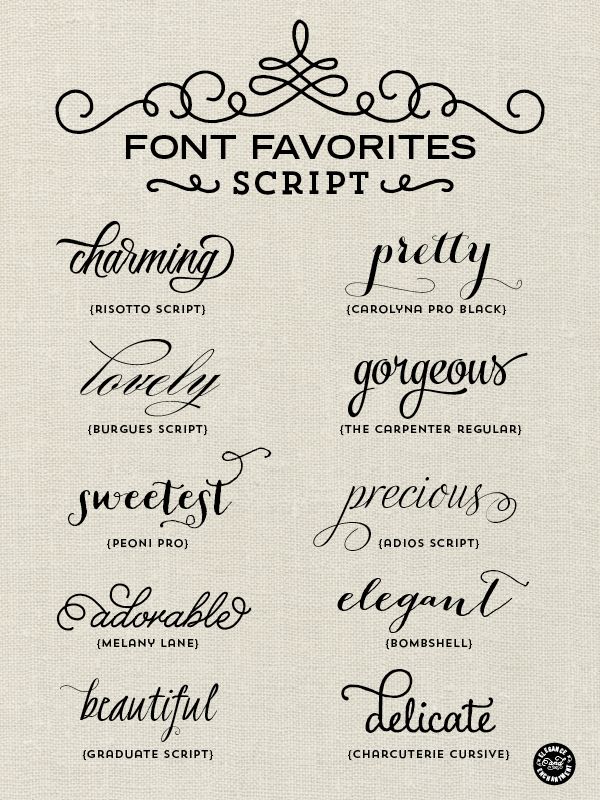
Once you have chosen the font you think best suits your DIY wedding invitations, search for it on the site I mentioned; when you find it, download it and copy it into a folder you can name “DIY wedding invitation fonts”.
After downloading them all, they should appear directly among the font options in the software you use. Now all you need to do is write the text, using the font you like most and that you feel best suits the graphic layout of your invitation. If you are using Publisher in particular, I found a tutorial that may help you with this process and with laying out the document:
Once you have written and decorated the text sheet of your wedding invitation, add the URL of your free Given2 event website and send them out. As soon as they arrive, thanks to our messaging service, you will receive confirmations from those attending your wedding and wedding gift payments directly through our platform 🙂
The final option for making DIY wedding invitations is Canva. A service that allows tech-savvy couples to create digital invitations: it lets you create graphics of all kinds, either from scratch or by editing pre-set templates, directly online and for free.
A similar site is Paperlesspost, which specialises in digital wedding invitations.
Admittedly, sending wedding invitations via the internet may still feel a little unconventional, but it can be an original way to accompany the physical invitation card. Speaking of printing, you can of course use your own printer, as we mentioned earlier, or turn to your trusted print shop, or better still, use one of these online services:
Printing
- An excellent website for creating wedding invitations is Vistaprint, which has a dedicated section with an online tool and a wide range of romantic graphic themes, perfect for an elegant and original invitation. Vistaprint handles both printing and delivery, and prices are fairly low, especially when you can take advantage of the many promotions available on the site.
- Minted is a premium online marketplace for wedding invitations and stationery, offering hundreds of designer templates that can be fully personalised online. Minted handles both printing and worldwide delivery, with a wide range of paper types and finishes for a truly polished result.
- Zazzle is a versatile online platform where you can design and print fully customised wedding invitations and stationery from scratch or starting from thousands of ready-made templates. Available in multiple languages, it ships worldwide and offers competitive prices with frequent discounts.
Extra free resources
Free templates for DIY wedding invitations
Southworth is a website that offers some free wedding invitation and announcement templates, downloadable in .doc format for Microsoft Word.
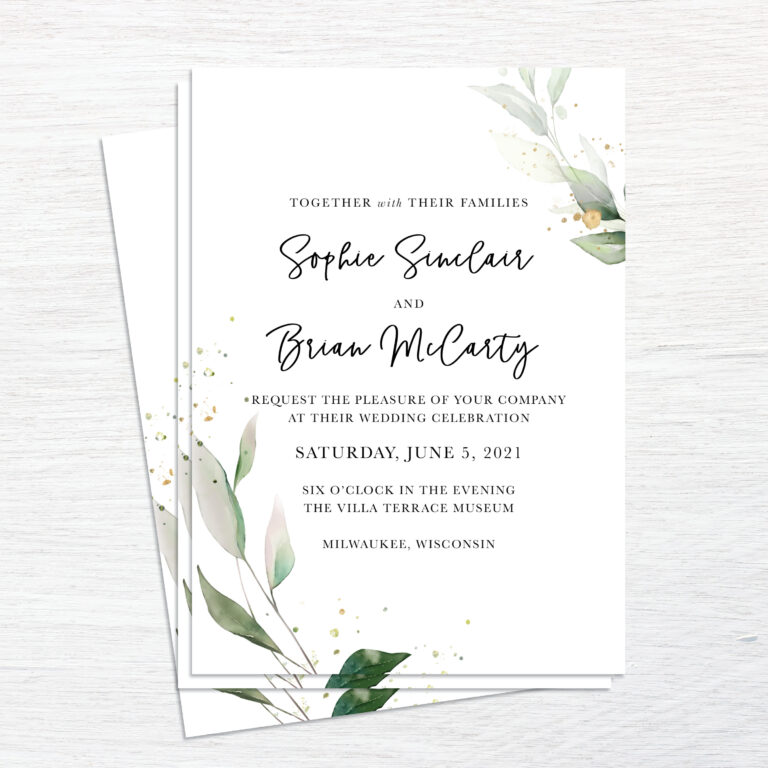
On the landing page (click here) you will find the link to the free downloadable Word file (.docx) (Printable files) that you can personalise. Or here (where you will also find the printing instructions), for this other type of invitation.

In both cases, simply open the invitation document you would like to personalise and click on it, so you can change the text using the word processing programme you have. On this site you will find 3 colour variants of this beautiful watercolour-style design (see example below).
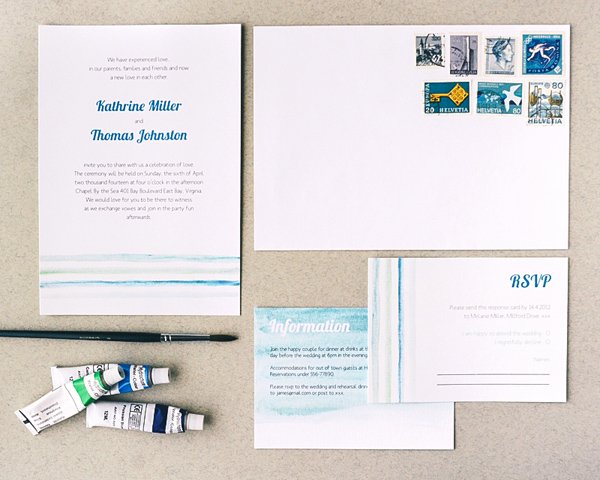
Another site where you can find beautiful free and customisable templates, including colour options, is weddingchicks.com.
In my opinion, this is the best platform for creating a perfect DIY wedding invitation for free. Each free template includes a form to fill in with your details and where you can select the colour to coordinate with the palette you have chosen for your wedding. The system will generate your personalised file with the selected options, ready to print. What do you think of this example?
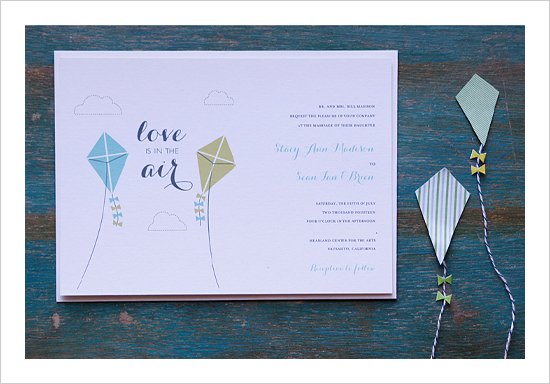
You just need to choose! Which of the solutions I have provided do you think you will go for?
Where to Buy Materials
To make your DIY invitations, you will need quality tools and materials.
The specific ones were recommended within the video tutorials. I therefore could not conclude this post dedicated to making handmade paper wedding invitations without leaving you the links to the online shops where you can purchase the necessary supplies to do it at its best:
- For craft supplies: amazon.com, craftsuppliesusa.com
- Envelopes: www.buste.com or www.paperandpeople.com
For more tips, guides and information on how to organise your wedding, keep coming back to this blog and, if you found this information useful and interesting, don’t forget to share it with all your friends! 😉
